The Communications module can be used for all communications related to a registration or POS transaction. Additionally, the Communications module allows for formatted letters (not merely simple text). The Communications module is used to:
- Create templates for standard outgoing correspondence (letters, etc.)
- Record all incoming and outgoing communications for registration and POS records.
Here we create a template and add text, multimedia and a table to it:
- Create a new record in the Communications module.
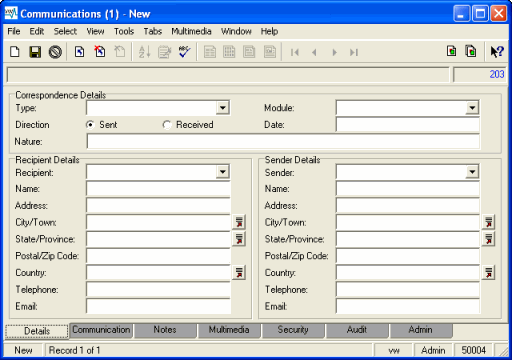
By default, Direction: (Correspondence Details) is set to Sent. Change this to Received if the template is intended for recording received correspondence.
Note: You could create a template for recording received phone calls, for example. The template could include headings for the details to be recorded, e.g. Time, Date, Notes, etc.
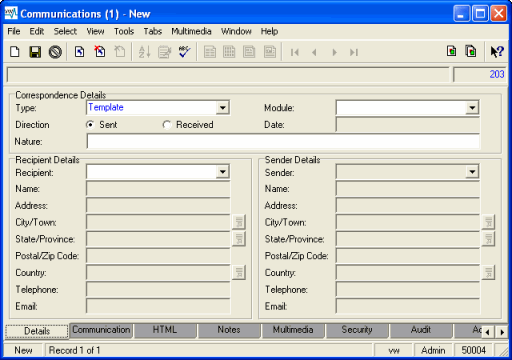
- Select Template from the Type: (Correspondence Details) drop list.
The HTML tab displays:
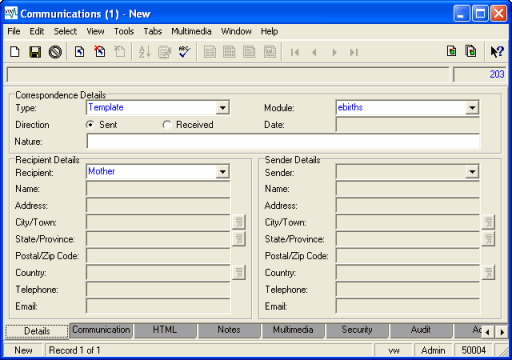
- Enter or select the module name that this template relates to from the Module: (Correspondence Details) drop list (or enter the module name), e.g. if the template is for a letter concerning missing birth details, select ebirths from the Module: (Correspondence Details) drop list.
This template will be accessible from the module specified here.
- If the recipient is always going to be the same, e.g. the mother, select or enter this value in the Recipient: (Recipient Details) drop list:
Note: The Field Mappings Registry entry is used to populate the address and contact details fields in the Recipient Details or Sender Details group of fields. An entry can be specified for any number of recipients / senders.
If you were to enterMotheras the recipient in the Recipient: (Recipient Details) drop list when creating a template,Motherwill display as the default recipient when the template is run.
In order that users are able to select any additional recipients / senders, e.g.Father, it is necessary to enterFatherin the Recipient: (Recipient Details) or Sender: (Sender Details) fields and to save the Communications record, or to create a Lookup List entry for that recipient / sender. Until this is done, the title of the recipient / sender will not display in the drop list. - On the Communication tab, enter a descriptive title for the template in the Template field, e.g.
Missing Details. - Select the method of communication that the template will be used to record from the Method drop list, e.g.
Email,Facsimile,Letter,Telephone. - Enter the text of the letter in the Letter Text area.
See How to enter text for a Letter / Letter Template below for details.
- Save the Template.
Note: Using special markers / place holders it is possible to extract information from any module and include it in the content of a Template. This includes multimedia. Details below.
There are several ways to create the content of a Letter / Template:
- Text can be entered and formatted directly in the Communication Text area of the Communication tab:
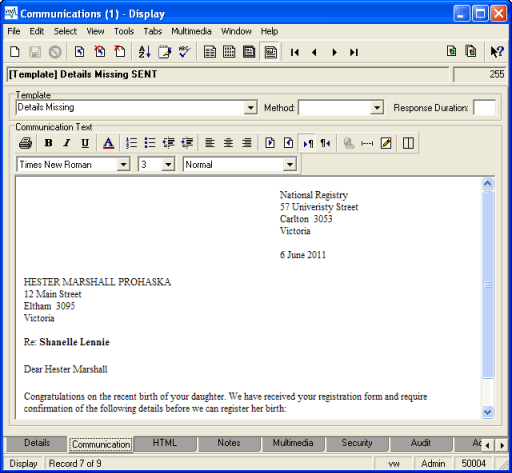
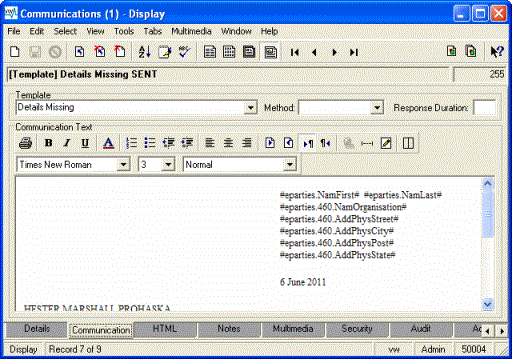
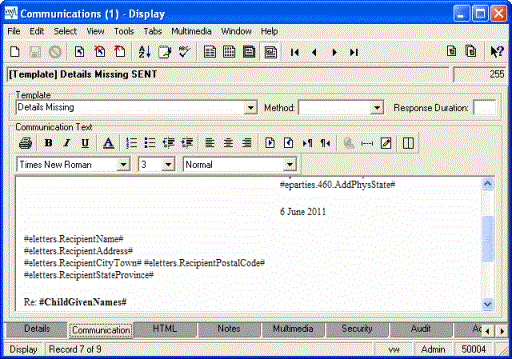
Note: See How to use special markers / place holders in a Template to discover how to replace names, addresses and other variable information with place holders: when a letter is generated using a template, any place holders will be substituted with the required information.
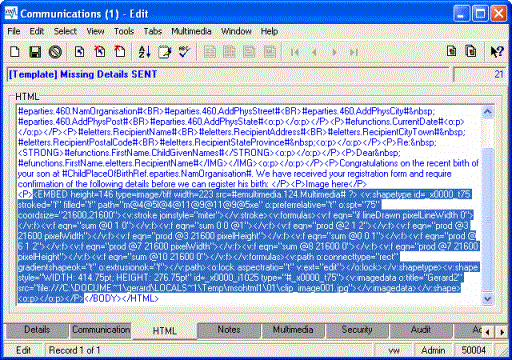
The HTML of content entered on the Communication tab can be viewed and edited on the HTML tab if necessary:

Note: The HTML tab only displays for Templates.
- If you are more comfortable working in a word processor such as MS Word, you can:
- Create the letter in the word processor:

- And copy and paste the content into the Communication Text field:

- Create the letter in the word processor:
- If you are more comfortable working in a word processor such as MS Word, you can:
To create a template that can be used time and again, identity and address information needs to be replaced with a special marker / place holder. When the template is used from a POS or registration record, the special markers will extract information from specified sources and include it in the content of the correspondence.
Images stored in the Multimedia module can also be included in the correspondence. See How to use special markers in a Template for details.
With special markers it is possible to include information from other Vitalware modules in a Template.
Information can be extracted from:
- The module that the Communication template is associated with.
This is the module name specified in Module: (Correspondence Details) on the Details tab of the Communication module. See How to create a Communications template for details.
- Any other module, including the Multimedia module.
| Source module | Data | Syntax |
|---|---|---|
| The registration or POS module that the Communications template is associated with | A field in the associated module | #ColumnName#
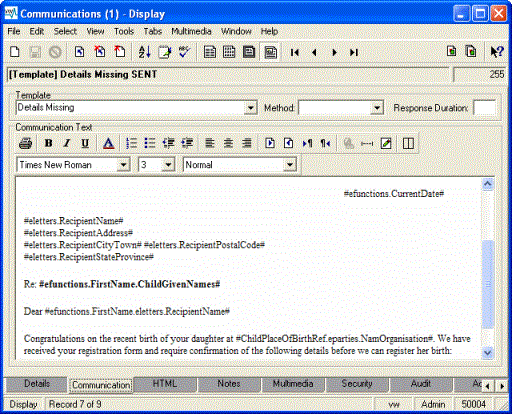
The place holder will be replaced with data from the In this example, a template configured for the Births module, the child's name is replaced with
|
| A reference field in the associated module |
The syntax for extracting data in a reference field in the associated module is:
For example, if the template is designed for the Births module, you could include the name of the hospital using:
|
|
| Any other Vitalware module |
The syntax for extracting data from any other module is:
For example, if there is a Parties record for your organi
|
|
| Communications module |
Information from the Communications module can be accessed using the following syntax:
This will pick up information from the details specified on the Details tab of the current Communications record. For example, to use the Recipient's address, you would enter:
|
|
| Parties module | Details about the sender / creator of the Template |
If the sender of the correspondence is the same as the creator of the template, name, address and other details can be drawn from the creator's Parties record. This requires that the Staff member's login id ( The syntax to be used is:
For example, to display the sender's first name:
If the sender and the creator of the template are not the same, the sender's Parties details can be accessed by referencing the IRN of the Parties record using the following syntax:
If the IRN of the sender's Parties record is 7 and we want to display their first name, we'd use the following place holder:
In this example it's assumed the sender is the same as the creator (user
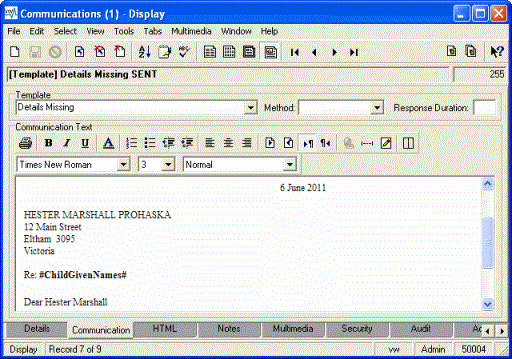
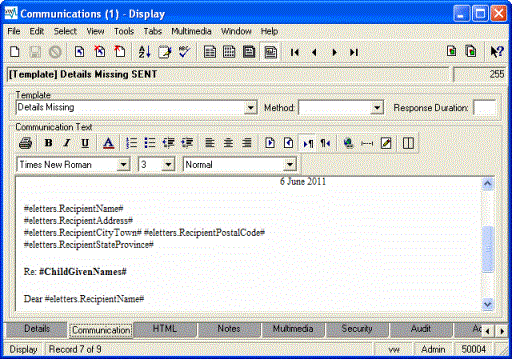
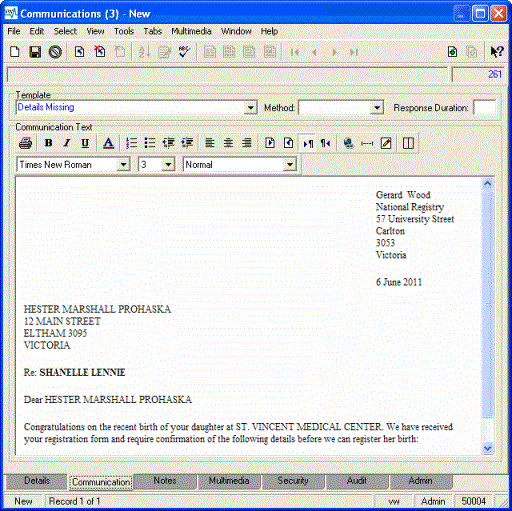
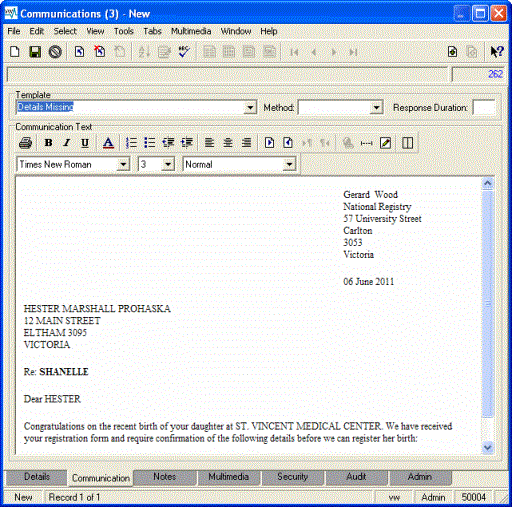
When we run this template from a record in the Births module, a letter similar to the following will be generated:
|
|
Data |
Syntax |
|---|---|
|
Special functions |
A number of special functions are available and are accessed using the syntax:
Functions include:
The formats of Date and Time are specified in the Date Output Registry entry and Time Output Registry entry.
For example:
The syntax for referencing a row in a nested table is: For example: Note:
Nested tables in Vitalware use a If we're referencing data from our own Parties record (that is, the Parties record of the person creating the Letters Template), it is not necessary to reference the IRN of the Parties record). For example, the following would work:
The previous example could be updated with the following special functions:
When we run this template from a record in the Births module, a letter similar to the following will be generated:
|
Note: If you want to include an image in your template, the image must be saved in a record in the Multimedia module.
- In the Multimedia module, locate the record of the image you want to include in the Communications template and note its IRN.
- In the Communications module, locate the template you want to use and select the HTML tab.
- An image is included using the
IMGtag in the following format. Enter the code where you want the image to display in the template:<IMG alt="Your text description for the image" src="#emultimedia.<MultimediaIRN>.Multimedia#" />where <MultimediaIRN> is the IRN of the Multimedia record for the image you wish to display.
If the IRN of the image record in the Multimedia module is 5, the image reference for a Birth certificate would be similar to:
<IMG alt="Birth Certificate" src="#emultimedia.5.Multimedia#" />Note: The
IMGtag does not support tif (tiff) images. In order to point to a TIFF, you will need to use theEMBEDtag. TheIMGtag does support jpg, gif and png.Note: The image will not display in the template itself, but when the template is run from a POS or registration record, the image will then display.
Multimedia may also be included by:
If you create content for your template in Word and copy and paste it into a Communications template record, any image will be lost and replaced by a placeholder as soon as the record is saved.
In order for the image to display when the template is run, it is necessary to:
Save the image as a record in the Multimedia module.
Edit the HTML of the template so that the image placeholder points to the record for the image in the Multimedia module.
- If there is no record in the Multimedia module for the image you want to include in the template, create a Multimedia record for the image.
- Note the IRN of the Multimedia record of the image you want to include in the template.
- In the Communications module, locate the template you want to use and select the HTML tab.
Depending on your version of MS Word, the image that you copy and paste into the template will be coded as HTML or XML.
In the next step we either update the HTML or replace the XML.
The format for referencing an image in the Multimedia module is:
#emultimedia.<MultimediaIRN>.Multimedia#If the IRN of the image record in the Multimedia module is 5, the image reference would be:
#emultimedia.5.Multimedia#
|
Image Code |
Update |
|---|---|
|
HTML |
If the image was copied and pasted as HTML, search for the
Edit the IMG tag as follows:
where <MultimediaIRN> is the IRN of the Multimedia record for the image you wish to display. If the IRN of the image record in the Multimedia module is 5, the image reference for a Birth certificate would be similar to:
|
|
XML |
Locate the XML for the image. For example:
Delete it and replace it with:
where <MultimediaIRN> is the IRN of the Multimedia record for the image you wish to display. If the IRN of the image record in the Multimedia module is 5, the image reference for a Birth certificate would be similar to:
|
Note:
The alt property is an alternative text description of the image. In a web environment, the alt text displays before an image is loaded and in place of the image if the image can't display for some reason. Replace Text description for the image as appropriate.
Note:
The IMG tag supports jpg, gif and png.
- In the Multimedia module, locate the record of the image you want to include in the template.
- In the Communications module, locate the template you want to use and select the Communication tab.
- Place the cursor in the template where you want the image to display.
- In the Multimedia module, in Details view, click the Drag Current Record
 button in the Tool bar and drag and drop the cursor on the Communication tab of the Communications module.
An image placeholder will display:

Note: The image does not display in the template itself, but when the template is run from a POS or registration record, the image will then display.
- Save the record.
It is also possible to resize an image in the template:
When an image is added to a template, its dimensions are defined in the image's Multimedia record. It is a simple matter to resize the image however.
Either:
- Drag the image to the required dimensions:
- Click the image placeholder on the Communication tab.
The resize indicators display. Click a corner and drag the image out to the required size:
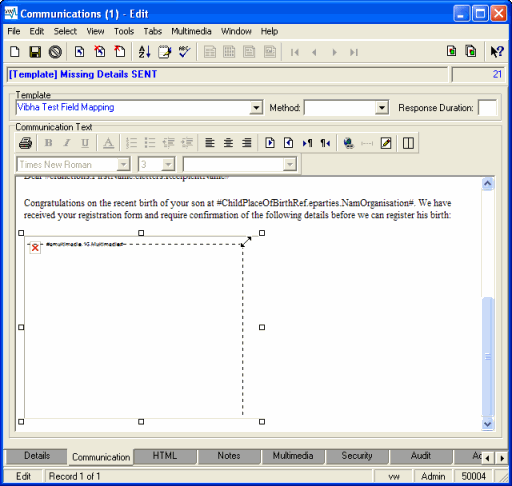
If you click the HTML tab and locate the IMG tag, you will see that the
styleelement has been updated with the new dimensions:<IMG style="WIDTH: 294px; HEIGHT: 169px" alt="Birth Certificate" src="#emultimedia.124.Multimedia#">
- Click the image placeholder on the Communication tab.
- Edit the
styleelement:- On the HTML tag, add the
styleelement to the IMG tag if it does not exist and provide the required dimensions, e.g.style="WIDTH: 294px; HEIGHT: 169px" <IMG style="WIDTH: 294px; HEIGHT: 169px" alt="Birth Certificate" src="#emultimedia.124.Multimedia#">- Or edit the
styletag as required: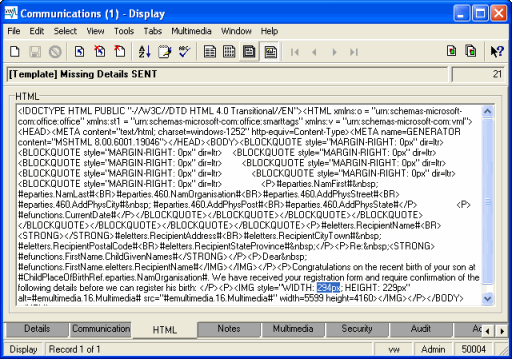
- On the HTML tag, add the
Tip: To avoid distorting an image when resizing it, resize the height and width proportionally.
The use of a table can greatly simplify the lay out of a template, especially if the template indents text, aligns elements of the text differently (left, right and cent
Working with anything but the most simple table design will require some knowledge of HTML. However, it is a simple matter to insert a table using the Insert Table  button available on the Communication tab:

- Place the cursor where you wish the table to display and click the Insert Table
 button.
A simple table will be inserted, comprising one row and two columns with a border:
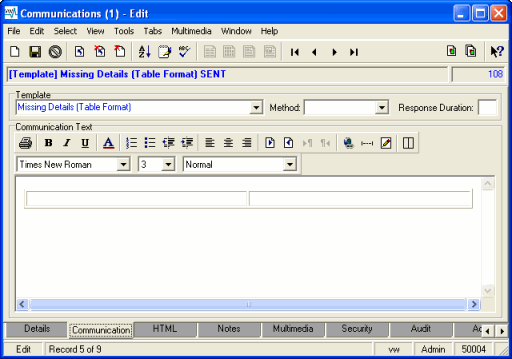
Note:
A border can be useful while laying out your template, but generally you will want to remove the border when you're satisfied with the layout. On the HTML tab, in the opening Table tag, change border=1 to border=0.
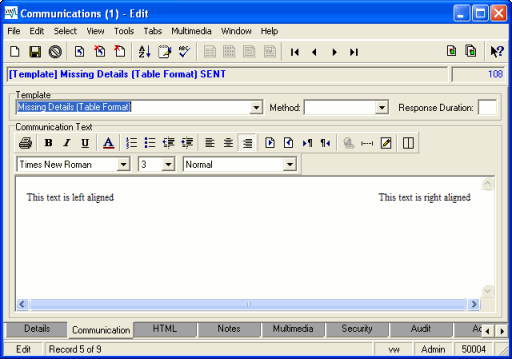
An advantage of using tables becomes apparent when aligning text differently on the same line. In a table, it is simply a matter of adding text to cells in a row and then applying paragraph alignment as required:
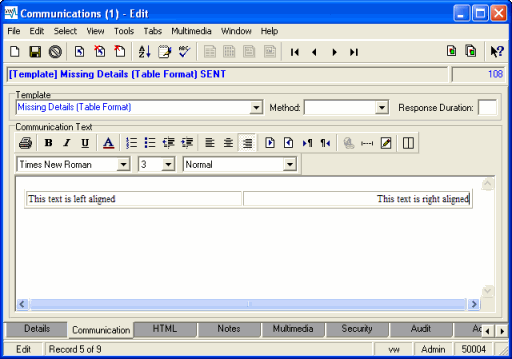
Without a table, this fairly simple layout would require considerably more complex HTML coding.
If we remove the border by changing:
<TABLE border=1 width="100%">
to
<TABLE border=0 width="100%">
the template displays as:
